Table of Contents
- Introduction
- Planning and Preparing Your Walls
- Choosing the Right Wallpaper
- Tools and Materials You’ll Need
- Step-by-Step Wallpaper Installation
- Common Mistakes to Avoid
- Finishing Touches and Trimming
- Maintenance and Care Tips
- Conclusion
1. Introduction
Wallpaper installation is a transformative DIY project that can instantly enhance the style and character of any room. Unlike paint, wallpaper adds texture, patterns, and color depth, creating a unique ambiance. While some may think wallpapering is a complex task, with proper planning, tools, and step-by-step guidance, even beginners can achieve professional-looking results.
2. Planning and Preparing Your Walls
Preparation is key to a smooth wallpaper installation:
- Clean Your Walls: Remove dust, grease, and any old wallpaper residues. A clean surface ensures strong adhesion.
- Repair Imperfections: Patch holes, cracks, and uneven spots with filler or spackle. Sand smooth for a uniform surface.
- Prime the Walls: Use a wallpaper primer or sizing solution to prevent bubbling and improve adhesion.
- Measure and Plan: Measure wall height and width accurately. Plan the layout to minimize awkward seams and mismatched patterns.
3. Choosing the Right Wallpaper
Selecting the right wallpaper is essential for both aesthetics and ease of installation:
- Material Type: Consider vinyl, non-woven, or paper-backed options. Vinyl is durable and moisture-resistant, ideal for kitchens and bathrooms.
- Pattern and Repeat: Pay attention to patterns and repeats. Matching patterns may require extra paper, so calculate your needs carefully.
- Peel-and-Stick vs. Traditional Paste: Peel-and-stick wallpaper is beginner-friendly and requires less mess, while traditional wallpaper offers a long-lasting finish.
- Color and Texture: Choose colors and textures that complement your furniture and room style. Lighter colors make small rooms feel larger, while textured wallpaper adds depth.
4. Tools and Materials You’ll Need
Having the right tools makes the job faster and more accurate:
- Wallpaper adhesive or paste (if not peel-and-stick)
- Measuring tape and pencil
- Utility knife or sharp scissors
- Smoothing brush or plastic smoother
- Level and plumb line for straight alignment
- Seam roller for edges
- Sponge or cloth for cleaning excess glue
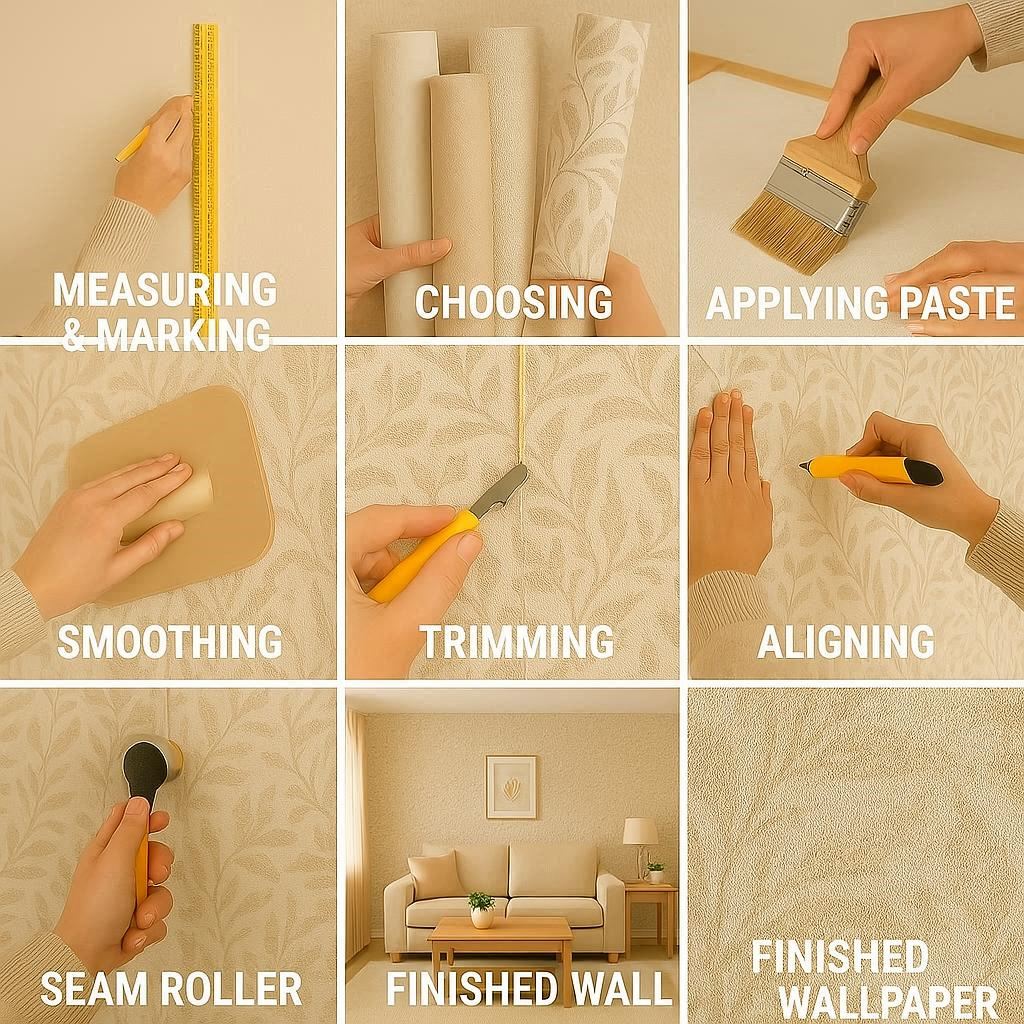
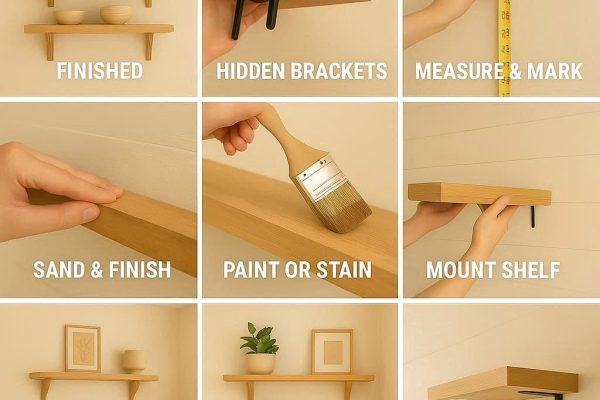
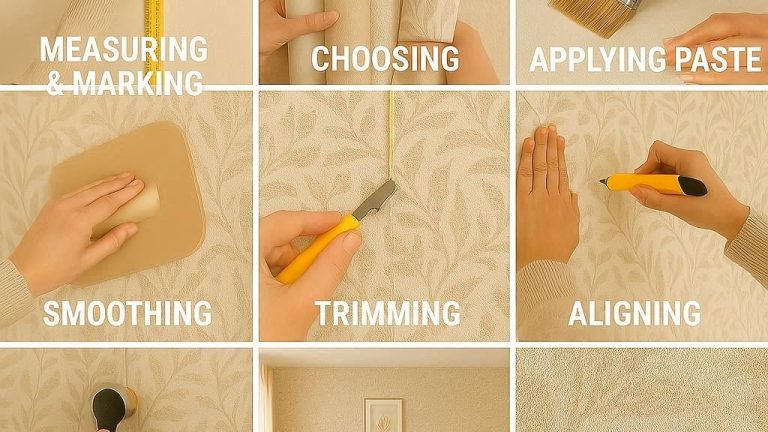
5. Step-by-Step Wallpaper Installation
Follow these steps for a seamless finish:
- Mark Your Starting Line: Use a level and plumb line to mark the starting vertical line. Start in a less conspicuous corner if possible.
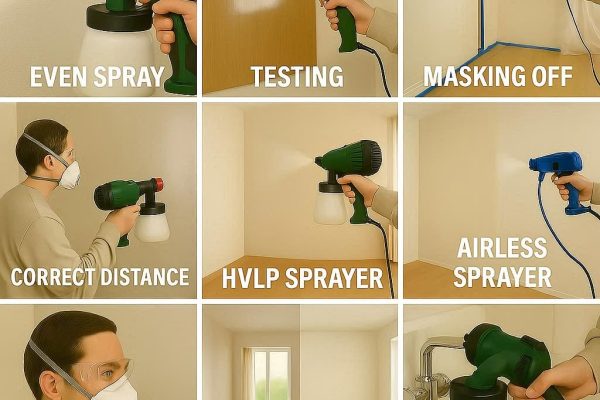
- Apply Adhesive: Spread wallpaper paste evenly on the back of the paper or directly on the wall if recommended.
- Position the First Strip: Align the edge with your plumb line, smoothing from top to bottom to remove air bubbles.
- Trim Excess: Use a utility knife to trim excess at ceiling and baseboard edges.
- Match Patterns: Carefully align patterns for subsequent strips. Overlap slightly if needed and smooth down.
- Remove Air Bubbles: Use a smoothing brush or plastic smoother, working from the center outwards.
- Roll the Seams: Apply a seam roller gently to ensure edges stick firmly without damaging the paper.
6. Common Mistakes to Avoid
Avoid these pitfalls for a professional look:
- Skipping Wall Prep: Adhesion suffers if walls are dirty or uneven.
- Not Matching Patterns: Misaligned patterns can look sloppy.
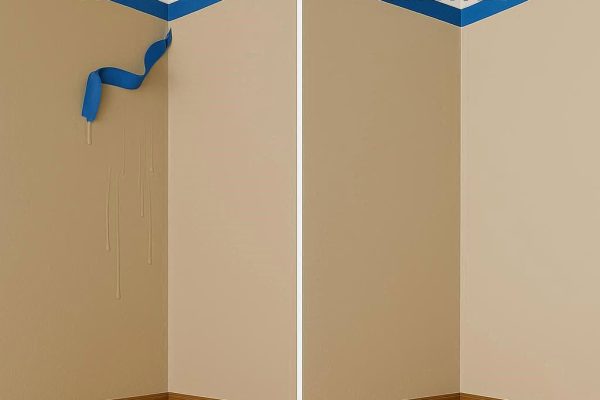
- Overapplying Adhesive: Excess glue may seep through, creating stains.
- Ignoring Seams: Seams that are not rolled can lift over time.
- Rushing the Job: Take your time; patience is critical for a flawless finish.
7. Finishing Touches and Trimming
Once the wallpaper is up:
- Trim any extra at corners, baseboards, and ceilings with a sharp utility knife.
- Wipe away any adhesive residue with a damp sponge.
- Allow wallpaper to dry completely before moving furniture or hanging decorations.
- Consider using decorative borders or trims to enhance the overall look.
8. Maintenance and Care Tips
Proper care ensures your wallpaper stays beautiful for years:
- Dust regularly with a soft, dry cloth or feather duster.
- Clean vinyl wallpapers with mild soap and water; avoid abrasive cleaners.
- Address tears or peeling edges promptly by reapplying adhesive.
- Avoid exposing wallpaper to direct sunlight for long periods to prevent fading.
9. Conclusion
Wallpaper installation is a rewarding DIY project that can dramatically change the look and feel of any room. With careful planning, the right tools, and attention to detail, you can achieve a professional finish that adds character, texture, and elegance. Whether you’re updating a living room, bedroom, or accent wall, following these tips ensures a flawless result that will impress for years to come.