Table of Contents
- Introduction
- Preparing Your Room
- Choosing the Right Paint and Tools
- Cleaning and Repairing Walls
- Protecting Floors and Furniture
- Cutting and Taping Edges
- Applying Primer
- Painting Techniques
- Second Coat and Touch-Ups
- Cleaning Up and Maintenance
- Conclusion
1. Introduction
Painting a room can dramatically transform the look and feel of your home. Whether you’re updating a tired living room, refreshing a bedroom, or adding character to a home office, mastering the painting process ensures professional-looking results. This guide walks you step by step through the process of painting a room like a pro, with practical tips, techniques, and advice to save time, reduce mistakes, and achieve a flawless finish.
2. Preparing Your Room
Preparation is key to a successful paint job:
- Remove Furniture: Take out as much furniture as possible, or move pieces to the center and cover them with protective sheets.
- Remove Wall Hangings: Take down pictures, mirrors, and shelves.
- Remove Outlet Covers and Switch Plates: This ensures clean edges around switches and sockets.
- Inspect the Room: Look for any wall damage that needs repair before painting.
3. Choosing the Right Paint and Tools
Selecting the correct paint and tools is essential:
- Paint Type: Latex paints are durable, easy to clean, and quick-drying; oil-based paints provide a smoother finish but require more cleanup.
- Finish: Matte or eggshell for walls, semi-gloss for trim, and high-gloss for doors.
- Brushes and Rollers: Use angled brushes for edges and corners, and rollers for large wall areas.
- Other Tools: Painter’s tape, drop cloths, paint trays, roller extensions, and stir sticks.
4. Cleaning and Repairing Walls
Clean walls ensure paint adheres properly:
- Dust and Wipe Down Walls: Use a damp cloth or sponge to remove dust and grime.
- Fill Holes and Cracks: Use spackling paste or wall filler to smooth over imperfections.
- Sand Surfaces: Lightly sand patched areas and glossy surfaces for better adhesion.
5. Protecting Floors and Furniture
Protect your room from spills and splatters:
- Lay Drop Cloths: Cover floors with canvas or plastic sheets.
- Tape Baseboards and Trim: Use painter’s tape for clean lines.
- Cover Remaining Furniture: Use old sheets or plastic to shield remaining items.
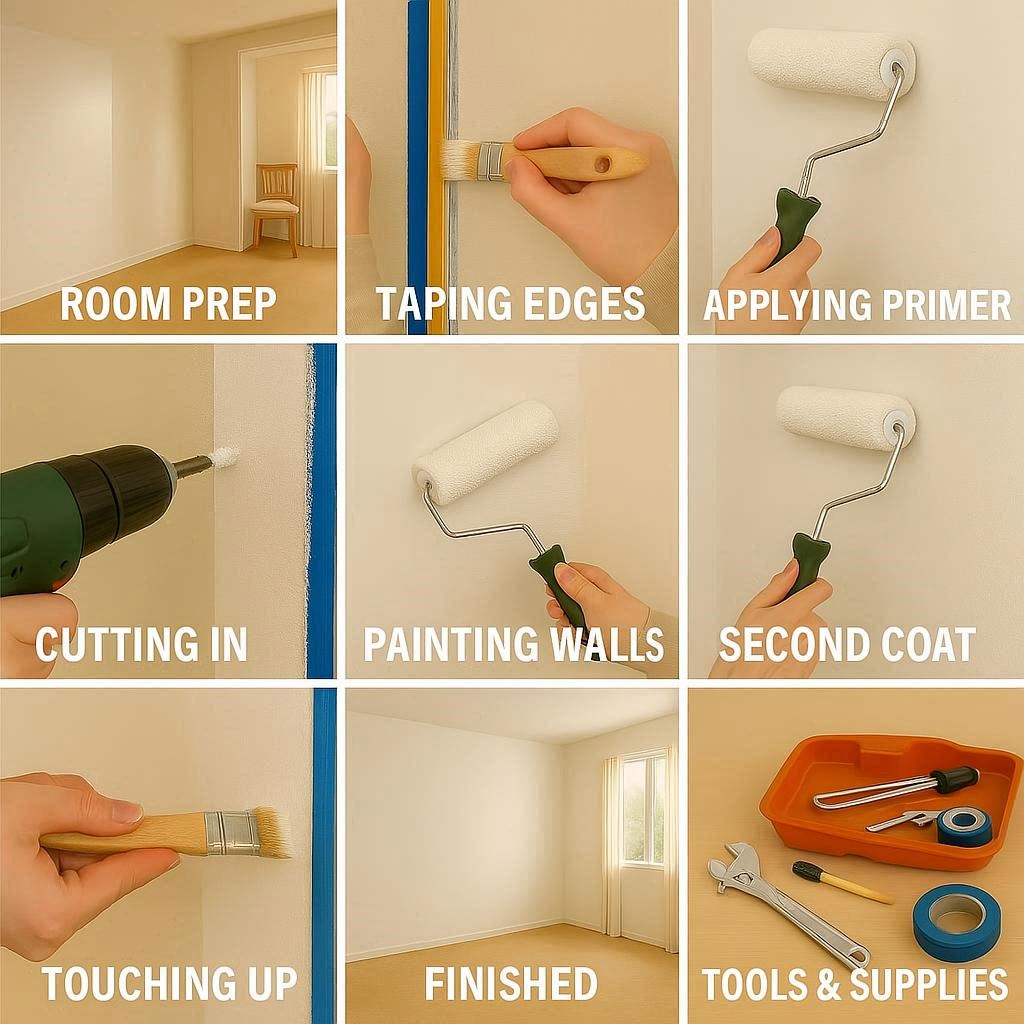
6. Cutting and Taping Edges
Clean edges make the paint job look professional:
- Apply Painter’s Tape: Tape along baseboards, windows, doors, and ceiling edges.
- Use an Angled Brush: Carefully cut in around edges to create a straight line where tape meets paint.
- Remove Tape Carefully: Wait until the paint is slightly dry but not fully cured to avoid peeling.
7. Applying Primer
Primer ensures a uniform finish:
- When to Use Primer: On bare walls, patched areas, or when changing from a dark to a light color.
- Applying Primer: Use a roller for large areas and a brush for corners and edges.
- Drying Time: Follow manufacturer instructions; typically 2–4 hours.
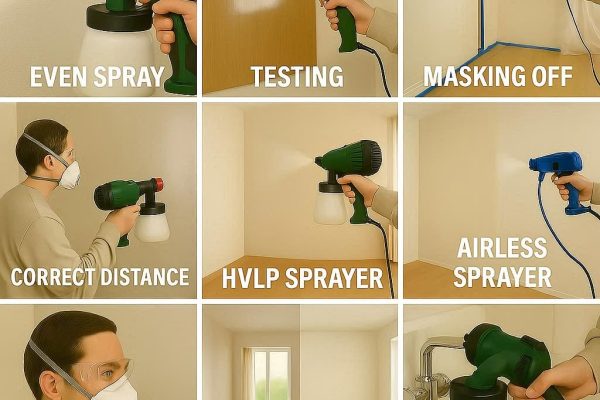
8. Painting Techniques
Proper techniques make a big difference:
- Start with Cutting In: Paint edges and corners first using a brush.
- Roll the Walls: Use a roller in a “W” or “M” pattern to distribute paint evenly.
- Work in Sections: Paint small sections at a time to maintain a wet edge and avoid streaks.
- Avoid Overloading Brush or Roller: Too much paint causes drips and uneven coverage.
9. Second Coat and Touch-Ups
Achieve a smooth, professional finish:
- Apply a Second Coat: Most walls require two coats for full coverage.
- Inspect for Missed Spots: Check under different lighting for streaks or bare spots.
- Touch-Up: Use a small brush to fix imperfections and blended edges.
10. Cleaning Up and Maintenance
Proper cleanup ensures longevity and future use of tools:
- Clean Brushes and Rollers: Wash latex paint with warm, soapy water; oil-based paint requires mineral spirits.
- Remove Drop Cloths and Tape: Do this carefully to avoid damaging fresh paint.
- Store Remaining Paint: Seal cans tightly and label with color and room name.
- Regular Maintenance: Clean walls gently with a damp cloth to maintain a fresh appearance.
11. Conclusion
Painting a room like a professional doesn’t require years of experience—just careful preparation, the right tools, and attention to detail. By following these step-by-step instructions, you can achieve a clean, beautiful finish that transforms your space. A freshly painted room not only enhances your home’s aesthetic but also increases its comfort and value.