Table of Contents
- Introduction
- Planning Your Laminate Flooring Project
- Tools and Materials You’ll Need
- Preparing the Subfloor
- Acclimating and Laying the Laminate
- Installing Underlayment
- Cutting and Fitting the Laminate Planks
- Finishing Touches and Trims
- Maintenance Tips for Long-Lasting Floors
- Conclusion
1. Introduction
Installing laminate flooring is an achievable DIY project even for beginners. Laminate flooring offers durability, easy maintenance, and a wide variety of styles that can mimic hardwood, stone, or tile. With careful planning, the right tools, and step-by-step guidance, you can transform your space with a professional-looking finish without the high cost of hiring contractors.
2. Planning Your Laminate Flooring Project
Before starting, proper planning is essential:
- Measure Your Space: Calculate square footage to determine how much laminate you need, plus 10% extra for cutting mistakes.
- Choose Your Laminate Style: Select a design that complements your interior décor.
- Budget Wisely: Include flooring, underlayment, tools, and trims in your budget.
- Plan the Layout: Decide the direction of the planks for visual appeal; running parallel to the longest wall usually looks best.
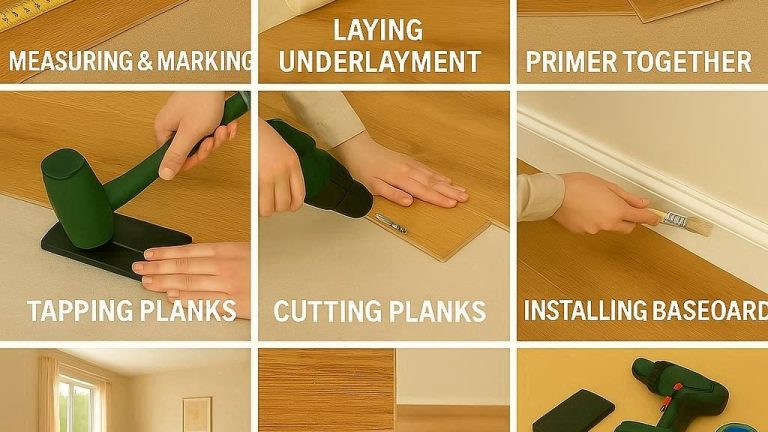
3. Tools and Materials You’ll Need
Gather all necessary items to ensure a smooth installation:
- Laminate planks
- Underlayment (foam or cork)
- Tape measure and pencil
- Utility knife or laminate cutter
- Rubber mallet and tapping block
- Spacers for expansion gaps
- Pull bar
- Safety gear (gloves, goggles)
4. Preparing the Subfloor
A clean, level subfloor ensures durability:
- Remove old flooring, nails, or debris.
- Vacuum and sweep thoroughly.
- Check for uneven areas; sand or patch low spots, and fill cracks.
- Ensure the subfloor is dry to prevent moisture damage to laminate.
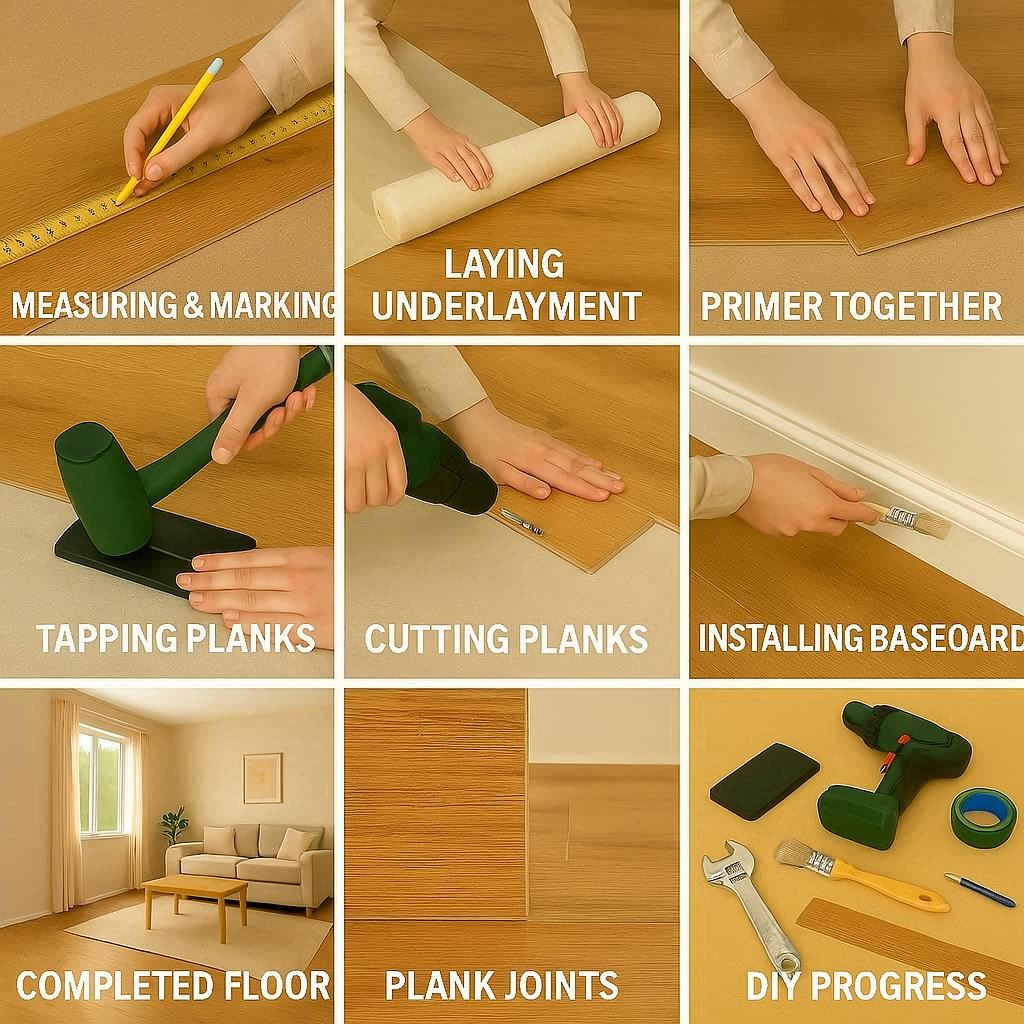
5. Acclimating and Laying the Laminate
Acclimating laminate prevents expansion or warping:
- Leave the unopened boxes of laminate in the room for 48 hours before installation.
- Roll out the underlayment, aligning seams according to manufacturer instructions.
- Use spacers along walls to maintain a 1/4-inch expansion gap.
- Begin laying planks from the left corner of the room, snapping them together as you go.
6. Installing Underlayment
Underlayment provides cushioning and reduces noise:
- Roll out underlayment perpendicular to plank direction.
- Tape seams if required.
- Ensure the underlayment covers the entire floor but does not overlap walls to maintain expansion space.
- Some laminate planks come with pre-attached underlayment; in that case, you can skip this step.
7. Cutting and Fitting the Laminate Planks
Precise cuts ensure a neat finish:
- Measure the last plank in each row and mark where to cut.
- Use a laminate cutter, saw, or utility knife with a straight edge for accuracy.
- Stagger end joints at least 12 inches apart for strength and visual appeal.
- Fit around obstacles like doorways, vents, and cabinets using a jigsaw if needed.
8. Finishing Touches and Trims
Add finishing details to complete the look:
- Install baseboards and quarter-round molding to cover expansion gaps.
- Use a pull bar to snugly fit the last row of planks.
- Clean the surface to remove dust and adhesive residue.
- Add door thresholds or transition strips for rooms with different flooring types.
9. Maintenance Tips for Long-Lasting Floors
Proper care extends the life of your laminate flooring:
- Sweep or vacuum regularly to remove dirt and debris.
- Wipe spills immediately to prevent damage.
- Use furniture pads to avoid scratches.
- Avoid wet mopping; instead, use a damp mop with laminate-safe cleaner.
10. Conclusion
Installing laminate flooring is a rewarding DIY project that can elevate the style and comfort of any room. With careful planning, preparation, and attention to detail, beginners can achieve a professional-quality floor while saving on labor costs. Follow these step-by-step instructions, and you’ll enjoy a beautiful, durable, and easy-to-maintain floor for years to come.